Beginner Sewing Guide
Learn to sew from scratch with our comprehensive guide for beginners.
Welcome to the wonderful world of sewing! Whether you’re looking to mend clothes, create beautiful home décor, or design custom garments, learning to sew opens up endless creative possibilities. This comprehensive beginner’s guide will walk you through everything you need to know to start your sewing journey with confidence.
Sewing for beginners doesn’t have to be intimidating. With the right tools, basic knowledge, and a bit of practice, you’ll be creating your first projects in no time. We’ll cover essential equipment, fundamental techniques, common mistakes to avoid, and simple projects perfect for building your skills.
Getting Started with Sewing
Before diving into your first project, it’s important to understand the basics and gather the essential tools. Sewing is a skill that improves with practice, so be patient with yourself as you learn. Every experienced sewist started exactly where you are now.
Choosing Your First Sewing Machine
Your sewing machine is the most important investment you’ll make as a beginning sewist. For beginners, a mechanical sewing machine with basic features is often the best choice. Look for machines that offer:
- 10-30 built-in stitches: Enough variety for most projects without overwhelming complexity
- Automatic needle threader: Saves time and reduces frustration
- Adjustable stitch length and width: Allows customization for different fabrics
- Free arm: Essential for sewing sleeves, pant legs, and circular items
- Drop-in bobbin: Easier to load and monitor than front-loading systems
- Good lighting: Makes detailed work much easier
Popular beginner-friendly brands include Singer, Brother, and Janome. Expect to spend $150-300 for a quality entry-level machine that will serve you well for years. Visit our sewing machines guide for detailed recommendations and reviews.
Beginner Tip:
Before making a purchase, read your machine’s manual thoroughly. Understanding your specific machine’s features and threading process will save you hours of frustration later.
Essential Sewing Supplies for Beginners
Beyond your sewing machine, you’ll need a collection of basic sewing supplies. Here’s what every beginner should have in their sewing kit:
Basic Sewing Kit Checklist:
- Fabric scissors: Sharp, dedicated scissors for cutting fabric only (never paper!)
- Seam ripper: Essential tool for fixing mistakes without damaging fabric
- Pins and pincushion: For holding fabric pieces together before sewing
- Hand sewing needles: Various sizes for different fabric weights
- Machine needles: Universal size 80/12 works for most fabrics
- Thread: All-purpose polyester thread in basic colors (black, white, navy, beige)
- Measuring tape: Flexible tape measure for accurate measurements
- Seam gauge: Small ruler perfect for measuring small distances and hems
- Fabric marking tools: Chalk, disappearing ink pens, or marking pencils
- Iron and ironing board: Critical for professional-looking results
Selecting Beginner-Friendly Fabrics
Choosing the right fabric makes a huge difference when you’re learning to sew. Start with fabrics that are easy to work with and forgiving of beginner mistakes. Cotton fabric is ideal for beginners because it’s stable, doesn’t stretch, and handles easily.
Best fabrics for beginners:
- Quilting cotton: Medium-weight, easy to cut and sew, available in endless patterns
- Cotton poplin: Crisp, smooth finish, perfect for simple garments
- Linen: Natural fiber with a beautiful texture, slightly more advanced but manageable
- Fleece: Great for no-hem projects like blankets and simple accessories
Avoid these fabrics as a beginner:
- Slippery fabrics like satin or silk (they shift and slide while sewing)
- Stretchy knits (require special techniques and needles)
- Very thin or sheer fabrics (difficult to control and easy to pucker)
- Thick upholstery fabrics (require more powerful machines)
Understanding Your Sewing Machine
Before starting your first project, spend time getting comfortable with your sewing machine. This familiarity will build confidence and prevent frustration later.
Threading Your Machine
Threading seems complicated at first, but it follows a logical path from the spool to the needle. Most machines have numbered guides or color-coded paths. The general threading sequence is:
- Place thread spool on the spool pin
- Guide thread through the first tension guide at the top
- Thread down and around the tension disc
- Thread up through the take-up lever
- Guide thread down through remaining guides
- Thread the needle from front to back (or use automatic threader)
- Pull thread under presser foot, leaving a 4-6 inch tail
Pro Tip:
Always thread your machine with the presser foot UP. This releases the tension discs and allows the thread to seat properly. Threading with the presser foot down is a common mistake that causes thread tension problems.
Winding and Inserting a Bobbin
The bobbin provides the underside thread for your stitches. Learning to wind and insert it correctly ensures smooth, even stitches.
To wind a bobbin:
- Place your thread spool on the machine’s spool pin
- Thread through the bobbin winding tension guide
- Place empty bobbin on the bobbin winder spindle
- Thread the bobbin by winding thread around it several times by hand
- Push the bobbin winder to engaged position
- Hold thread tail and press foot pedal to wind
- Stop when bobbin is full (some machines stop automatically)
Adjusting Tension
Proper thread tension creates balanced stitches that look the same on both sides of the fabric. Most machines are set to correct tension from the factory (usually around 4-5 on a dial of 0-9), but you may need to adjust for different fabrics or threads.
Signs of tension problems:
- Top thread showing on bottom: Top tension too tight or bottom too loose
- Bottom thread showing on top: Top tension too loose or bottom too tight
- Puckered fabric: Both tensions may be too tight
- Loops on bottom: Top tension is too loose
Important:
Before adjusting tension settings, rethread your entire machine (top and bobbin). Many “tension problems” are actually threading errors. Also ensure you’re using the same weight thread in both top and bobbin.
Essential Sewing Techniques
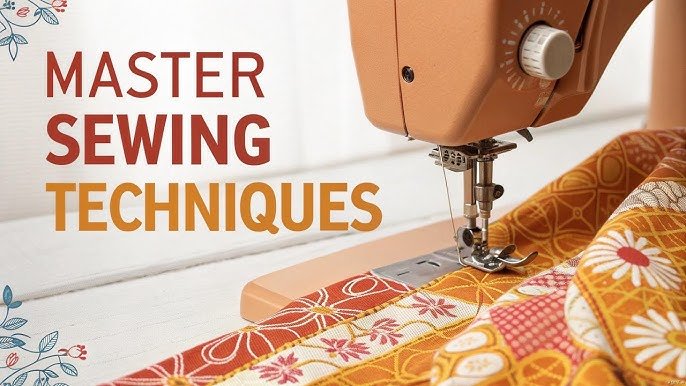
Mastering these fundamental techniques will give you the foundation for all your sewing projects. Practice each one on scrap fabric before starting your first project.
Straight Stitch Practice
The straight stitch is the most basic and useful stitch. Before sewing an actual project, practice running straight lines on scrap fabric:
- Draw straight lines on scrap fabric using a fabric marker
- Lower the presser foot onto the fabric
- Position the needle where you want to start
- Hold thread tails for the first few stitches to prevent jamming
- Press the foot pedal gently to control speed
- Guide fabric gently—don’t push or pull
- Keep your eyes on the seam guide, not the needle
Backstitching (Securing Your Seams)
Backstitching locks your stitches at the beginning and end of seams, preventing them from unraveling. Most machines have a reverse button or lever:
- Start sewing forward 3-4 stitches
- Press and hold the reverse button
- Backstitch over those first stitches
- Release reverse button and continue forward
- At the end of your seam, backstitch again for 3-4 stitches
- Lift presser foot and remove fabric
- Cut threads leaving a few inches
Sewing Curves and Corners
Curves and corners require slowing down and pivoting your fabric:
For corners:
- Sew to the corner point
- Stop with needle down in fabric
- Lift presser foot
- Pivot fabric to new direction
- Lower presser foot and continue
For curves:
- Sew slowly around curves
- For tight curves, stop frequently with needle down
- Lift presser foot slightly and adjust fabric angle
- Lower foot and continue
- Practice makes these movements smooth and natural
Seam Allowances
Seam allowance is the distance between the edge of your fabric and your line of stitching. Standard seam allowances are 5/8″ (1.5cm) for garments and 1/4″ for quilting. Your machine’s throat plate usually has lines marking common seam allowances.
Pressing as You Sew
Professional sewists follow this golden rule: press every seam before crossing it with another seam. Pressing opens seams, flattens fabric, and creates crisp, professional results. Use these pressing techniques:
- Press, don’t iron: Lift and lower the iron rather than sliding it
- Press seams open or to one side: Follow your pattern instructions
- Use appropriate heat: Cotton can take high heat; synthetics need low
- Consider a pressing cloth: Protects delicate fabrics from shine
Perfect First Projects for Beginners
Start with simple projects that teach fundamental skills without overwhelming you. Each project should introduce one or two new techniques while reinforcing what you’ve already learned.
Simple Pillow Cover
A basic envelope-style pillow cover teaches straight seams, measuring, and finishing edges. You’ll learn:
- Cutting fabric to size
- Hemming edges
- Sewing straight seams
- Turning corners
Materials needed: Cotton fabric, thread, pillow insert. Time: 1-2 hours.
Tote Bag
A simple tote bag introduces handles, reinforced seams, and boxing corners. This practical project teaches:
- Measuring and cutting multiple pieces
- Attaching handles
- Reinforcing stress points
- Creating boxed corners for dimension
Materials needed: Sturdy canvas or heavy cotton, webbing for handles. Time: 2-3 hours.
Simple Drawstring Bag
Perfect for practicing straight seams and learning to create casings for drawstrings. You’ll practice:
- Creating channels/casings
- Sewing tubes of fabric
- Threading cord through casings
- Finishing raw edges
Materials needed: Lightweight cotton, cord or ribbon. Time: 1 hour.
Fabric Napkins
Multiple small projects in one, napkins are excellent for practicing consistent seam allowances and corners. You’ll master:
- Accurate measuring and cutting
- Mitered corners
- Narrow hems
- Consistency across multiple items
Materials needed: Cotton fabric, thread. Time: 30 minutes each.
Project Success Tips:
Start with projects in solid colors or simple patterns. Bold geometric prints can make it harder to see if your seams are straight. Save complicated patterns for when your skills improve.
Common Beginner Mistakes and How to Avoid Them
Not Reading the Manual
Your machine’s manual is your best friend. It explains threading, troubleshooting, maintenance, and which settings to use for different fabrics. Keep it handy in your sewing space.
Skipping Test Seams
Always test your stitch on scrap fabric before starting a project. This simple step catches tension problems, incorrect settings, or needle issues before they ruin your work.
Using Dull Needles or Wrong Needle Type
Change your needle after every 8-10 hours of sewing or at the start of each new project. Dull needles cause skipped stitches, puckering, and can damage fabric. Use the correct needle type for your fabric—universal needles work for woven cottons, while ballpoint needles are needed for knits.
Not Pressing Seams
Many beginners skip pressing, but this is what separates amateur work from professional results. Press every seam as you go. It’s not optional—it’s essential.
Pulling or Pushing Fabric
Let your machine’s feed dogs move the fabric. Your job is to guide it gently, not force it. Pulling causes uneven stitches and can bend the needle.
Going Too Fast
Speed comes with practice. Start slowly to maintain control and accuracy. You can always speed up later, but rushed mistakes take time to fix.
Not Securing Thread Tails
Failing to backstitch or tie off threads means seams can unravel. Always secure the beginning and end of every seam.
Building Your Skills
Learning to sew is like learning any new skill—consistent practice leads to improvement. Here’s how to accelerate your progress:
Practice Regularly
Even 15-30 minutes of practice several times a week is better than marathon sessions once a month. Regular practice builds muscle memory and confidence.
Start a Scrap Fabric Collection
Save fabric scraps from projects for practicing new techniques. Having a variety of fabric weights and types lets you experiment freely without wasting money.
Join a Sewing Community
Online sewing communities, local classes, or sewing groups provide support, inspiration, and answers to questions. Don’t hesitate to ask for help—experienced sewists remember being beginners too.
Watch Video Tutorials
Seeing techniques in action clarifies written instructions. Search for video tutorials when you encounter new techniques in patterns.
Keep a Sewing Journal
Document your projects, noting what worked well and what to do differently next time. Record tension settings, needle sizes, and techniques used. This reference becomes invaluable as you tackle more complex projects.
Embrace Mistakes
Every mistake is a learning opportunity. That seam ripper in your toolkit? It will become your best friend. Even experienced sewists use it regularly. Mistakes are part of the process, not signs of failure.
Next Steps in Your Sewing Journey
Once you’ve mastered the basics and completed several beginner projects, you’re ready to expand your skills:
Explore Different Fabric Types
Branch out from basic cottons to try fleece, linen, and lightweight synthetics. Each fabric type teaches you new handling techniques.
Learn Garment Construction
Start with simple patterns like elastic-waist skirts or pajama pants. As confidence grows, progress to patterns with zippers, buttons, and fitted shapes.
Try New Techniques
Add techniques to your skillset one at a time: installing zippers, making buttonholes, gathering fabric, creating pleats, or working with bias tape.
Invest in Better Tools
As your skills improve, upgrade tools gradually. Better scissors, specialized presser feet, and quality cutting mats make sewing more enjoyable.
Challenge Yourself
Set achievable goals like making gifts for friends, creating a specific wardrobe piece, or mastering a particular technique. Goals keep you motivated and focused.
Your Sewing Journey Begins
Learning to sew opens a world of creativity, self-sufficiency, and satisfaction. From mending clothes to creating custom home décor and eventually designing unique garments, your new skills will serve you for a lifetime. Remember that every expert sewist started exactly where you are now—with basic tools, simple projects, and the willingness to learn.
Be patient with yourself, practice regularly, and don’t let mistakes discourage you. Each project improves your skills, and soon techniques that once seemed complicated will become second nature. The sewing community is welcoming and supportive, so don’t hesitate to seek help when needed.
Ready to get started? Browse our selection of beginner-friendly sewing machines, stock up on essential sewing supplies, and choose your first cotton fabric for practice. Your creative journey starts today!
Happy sewing, and welcome to the wonderful world of creating with fabric!